2022. 12. 9. 21:04, 외부활동/멋사 앱스쿨 1기
22-10-27 목요일
7주차
🦢 SwiftUI
스유에서 그래픽 요소를 사용해보자!
✔️ Graphic Drawing Basic
SwiftUI에 내장된 도형, Gradient 드로잉과 새로운 뷰로 커스텀 드로잉을 할 수 있다.
2D 드로잉을 지원한다. 3D 드로잉을 원하면 게임이나 AR, VR 쪽으로 이해하면 된다. 그리고 이런 것을 하려면 Xcode보다는 Unity같은 툴을 사용하는게 좋다.
커스텀 드로잉을 해야할 때? 드로잉 앱이나 사진 편집 앱 등의 창의성앱을 만들 때 커스텀 드로잉 기능을 준비하고 사용자가 문지르면 나오게 해야 한다. 이런 앱을 만들 때 ‘준비’해둬야 하는 기능인거다.
기본 도형들
- Rectangle
- 사각형
- Circle
- 원형
- width, height에서 작은 값을 원의 반지름*2 값으로 가진다. circle로 타원형은 만들 수 없다.
- Capsule
- 알약 모양
- RoundRectangle
- 둥근 사각형
- cornerRaius
- stroke, dash
- Ellipse
- 타원
struct ContentView: View {
    var body: some View {
        VStack {
            Text("Hello, Rectangle!")
                .font(.largeTitle)
            Rectangle()

            Text("Hello, Circle!")
                .font(.largeTitle)
            Circle()
                .fill(Color.purple)
                .frame(width: 100, height: 100)

            Text("Hello, Capsule!")
                .font(.largeTitle)
            Capsule()
                .stroke(lineWidth: 10)
                .foregroundColor(.blue)
                .frame(width: 100, height: 50)

            Text("Hello, RoundRectangle!")
            RoundedRectangle(cornerRadius: CGFloat(20))
                .stroke(style: StrokeStyle(lineWidth: CGFloat(8), dash: [CGFloat(10), CGFloat(5)])) // 10단위로 점찍고 5단위로 간격

            Text("Hello Ellipse!")
            Ellipse()
                .stroke(style: StrokeStyle(lineWidth: 20, dash: [CGFloat(10), CGFloat(5), CGFloat(2)], dashPhase: CGFloat(10)))
                .foregroundColor(.blue)
                .frame(width: 250, height: 150)
        }
        .padding()
    }
}

struct ContentView_Previews: PreviewProvider {
    static var previews: some View {
        ContentView()
    }
}

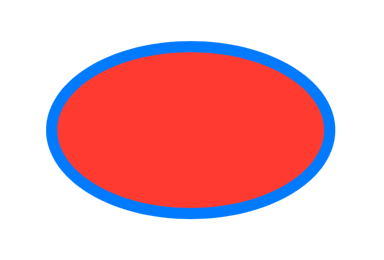
뷰 위에 겹치게 그리고 싶은게 있다면?
overlay를 사용해보자.
struct ContentView: View {
    var body: some View {
        VStack {
            Ellipse()
                .fill(Color.red)
                .overlay(
                    Ellipse()
                        .stroke(Color.blue, lineWidth: 10)
                )
                .frame(width: 250, height: 150)
        }
        .padding()
    }
}
Custom Path, Shape
직접 도형을 만들어보자.
Shape을 따르는 구조체로 작성할 수 있다.
struct ContentView: View {
    var body: some View {
        VStack {
            Path { path in
                path.move(to: CGPoint(x: 10, y: 0))
                path.addLine(to: CGPoint(x: 10, y: 350))
                path.addLine(to: CGPoint(x: 300, y: 300))
                path.closeSubpath()
            }
            .fill(Color.green)
        }
        .padding()
    }
}

struct MyShape: Shape {
    func path(in rect: CGRect) -> Path {
        var path = Path()
        // 도형을 정의하는 코드는 여기에 추가..
        path.move(to: CGPoint(x: 10, y: 0))
        path.addLine(to: CGPoint(x: 10, y: 350))
        path.addLine(to: CGPoint(x: 300, y: 300))
        path.closeSubpath()
        return path
    }
}
Gradient
그라데이션도 넣을 수 있다.
import SwiftUI

struct ContentView: View {

    let colors = Gradient(colors: [Color.red, Color.yellow,
    Color.green, Color.blue, Color.purple])

    var body: some View {

        MyShape()
            .fill(RadialGradient(gradient: colors,
                                   center: .center,
                              startRadius: CGFloat(0),
                                endRadius: CGFloat(300)))
             .background(LinearGradient(gradient: Gradient(colors:
                                       [Color.black, Color.white]),
                               startPoint: .topLeading,
                                 endPoint: .bottomTrailing))
             .frame(width: 360, height: 350)
    }
}

struct MyShape: Shape {
    func path(in rect: CGRect) -> Path {
        var path = Path()

        path.move(to: CGPoint(x: rect.minX, y: rect.minY))
        path.addQuadCurve(to: CGPoint(x: rect.minX, y: rect.maxY),
            control: CGPoint(x: rect.midX, y: rect.midY))
        path.addLine(to: CGPoint(x: rect.minX, y: rect.maxY))
        path.addLine(to: CGPoint(x: rect.maxX, y: rect.maxY))
        path.closeSubpath()
        return path
    }
}
'외부활동 > 멋사 앱스쿨 1기' 카테고리의 다른 글
| [SwiftUI] TabView, Context Menu를 사용해보자. (2) | 2022.12.09 |
|---|---|
| [SwiftUI] List, Navigation을 이용해서 간단한 앱 구현하기 (EVCar Demo) (0) | 2022.12.09 |
| [SwiftUI] Observable Object와 Environment Object에 대해 알아보자. (0) | 2022.12.09 |
| [TIL] 22-10-21: SwiftUI 기초(룰렛 게임) (2) | 2022.10.25 |
| [TIL] 22-10-20: Typography, SwiftUI 기초(숫자 게임) (0) | 2022.10.25 |
Comments, Trackbacks