22-10-26 수요일
7주차
🦢SwiftUI
스유의 TabView, Context Menu를 배워보자.
TabView는 UIkit의 TabbarController과 같다. 써보니까 너무 쉬워서 헛웃음이 ;;; ㅋㅋㅋ
Context Menu는 가사오케 앱에서도 썼는데, 정확히 Long press로 동작하는 메뉴이다. 아래에서 살펴보자!
먼저 복습부터~~
📒 Review: List, Navigation
1️⃣ List
// (1)
List {
	...
}

// (2)
List {
	HStack {
		...
	}
}

// (3)
List {
	ForEach {
		HStack {
			...
		}
	}
}- List { … }
- List { HStack { … } }
- padding()을 걸면 붕 뜨게 된다. 주의하자!
2️⃣ Navigation
// (1)
struct ContentView: View {
	var body: some View {
		NavigationView {
			List {
				NavigationLink(destination: {
					NewView()
				}, label: {
					HStack {
						...
					}
				})
			}
			.navigationTitle(Text("Hello"))
		}
	}
}

...

struct NewView() {
	var body: some View {
		VStack {
			Image(...)
		}
	}
}- NavigationView
- NavigationTitle은 NavigationView 내부의 가장 최상단 View에 걸어준다.
✔️ Tab View
앱에서 흔히 보이는 하단 탭의 기능을 구현할 수 있다.
1️⃣ SwiftUI Tab View
TabView는 TabView Container View를 사용하여 생성된다. 탭들은 하위 뷰들로 구성된다.
TabView는 탭 바를 레이아웃 하단에 배치하고, 탭 바 안에는 하위 뷰로 이동하는데 사용하는 탭 아이템이 들어있다.
- Tab View, Tab Bar, Tab Item
- Text, Image 뷰들만 탭 아이템에 구성될 수 있다.
- Tab Item은 5개가 권장사항이다. 더 이상 만들 수 있지만, 되도록 가이드라인을 지키자.
2️⃣ Tab Item 추가하기
struct ContentView: View {
    var body: some View {
        TabView {
            Text("Tab Content 1").tabItem{
                Text("Tab Label 1")
            }.tag(1)

            Text("Tab Content 2").tabItem{
                Text("Tab Label 2")
            }.tag(2)

            Text("Tab Content 3").tabItem{
                Text("Tab Label 3")
            }.tag(3)

            Text("Tab Content 4").tabItem{
                Text("Tab Label 4")
            }.tag(4)

            Text("Tab Content 5").tabItem{
                Text("Tab Label 5")
            }.tag(5)
        }
    }
}
tabItem을 추가하고, 태그를 달 수 있다. 선택된 탭을 제어하려면 태그를 달아주어야 한다.
태그를 달아줘야 해당 탭의 번호가 부여되고, selection 매개변수로 탭 이동을 할 수 있다.
3️⃣ Tab을 눌러 다른 View로 이동하게 하기
struct ContentView: View {
    var body: some View {
        TabView {
			// 따로 Stack으로 안묶어도 된다.
			// 가로 모드로 하면 왜 그런지 알 수 있다. 알아서 배치해준다!
            SecondView().tabItem {
                Image(systemName: "house.fill")
                Text("Tab Label 1")
            }.tag(1)

            SecondView().tabItem {
                Image(systemName: "house.circle")
                Text("Tab Label 2")
            }.tag(2)

            SecondView().tabItem {
                Image(systemName: "music.note.house.fill")
                Text("Tab Label 3")
            }.tag(3)

            SecondView().tabItem {
                Image(systemName: "homepod.2.fill")
                Text("Tab Label 4")
            }.tag(4)

            SecondView().tabItem {
                Image(systemName: "homepodmini.and.appletv.fill")
                Text("Tab Label 5")
            }.tag(5)
        }
    }
}

struct SecondView: View {
    var body: some View {
        VStack {
            Text("Hello World")
                .font(.largeTitle)
        }
    }
}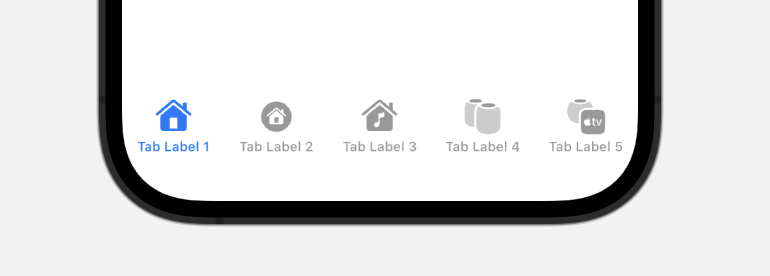
앞에서는 Text에 tabItem을 걸어주었다. Text도 하나의 View이므로 탭으로 이동이 가능하다.
그러므로 Text 대신 하위 뷰를 넣어줄 수 있다. 위 코드에서는 SecondView를 만들었다!
4️⃣ TabView + NavigationView
struct ContentView: View {
		// 현재 어떤 탭이 선택되었는지 저장하기 위한 상태 프로퍼티
    // 마지막으로 갔던 탭으로 가게 할 수 있다.
    @State private var tabSelection = 1
    var body: some View {
        TabView(selection: $tabSelection) {
            NavigationView {
                SecondView()
            }.tabItem {
                Image(systemName: "house.fill")
                Text("Tab Label 1")
            }.tag(1)

            NavigationView {
                SecondView()
            }.tabItem {
                Image(systemName: "house.circle")
                Text("Tab Label 2")
            }.tag(2)

            NavigationView {
                SecondView()
            }.tabItem {
                Image(systemName: "music.note.house.fill")
                Text("Tab Label 3")
            }.tag(3)

        }
    }
}

struct SecondView: View {
    var body: some View {
        List {
            NavigationLink(destination: ThirdView(), label: {
                VStack {
                    Text("Hello~")
                }
            })
        }.navigationTitle("Hello World")
    }
}
TabView 안에 Navi를 몰아넣어주자! 해당 Navi는 하위뷰에서만 적용된다. 쿠쿸
✔️ Context Menu
사용자가 뷰를 길게 누르면(long press) 나타나는 메뉴가 Context Menu이다.
Context menus - Menus and actions - Components - Human Interface Guidelines - Design - Apple Developer
A context menu provides access to functionality that’s directly related to an onscreen item, without cluttering the interface. Although a context menu provides convenient access to frequently used items, it’s hidden by default, so people might not know
developer.apple.com
예시
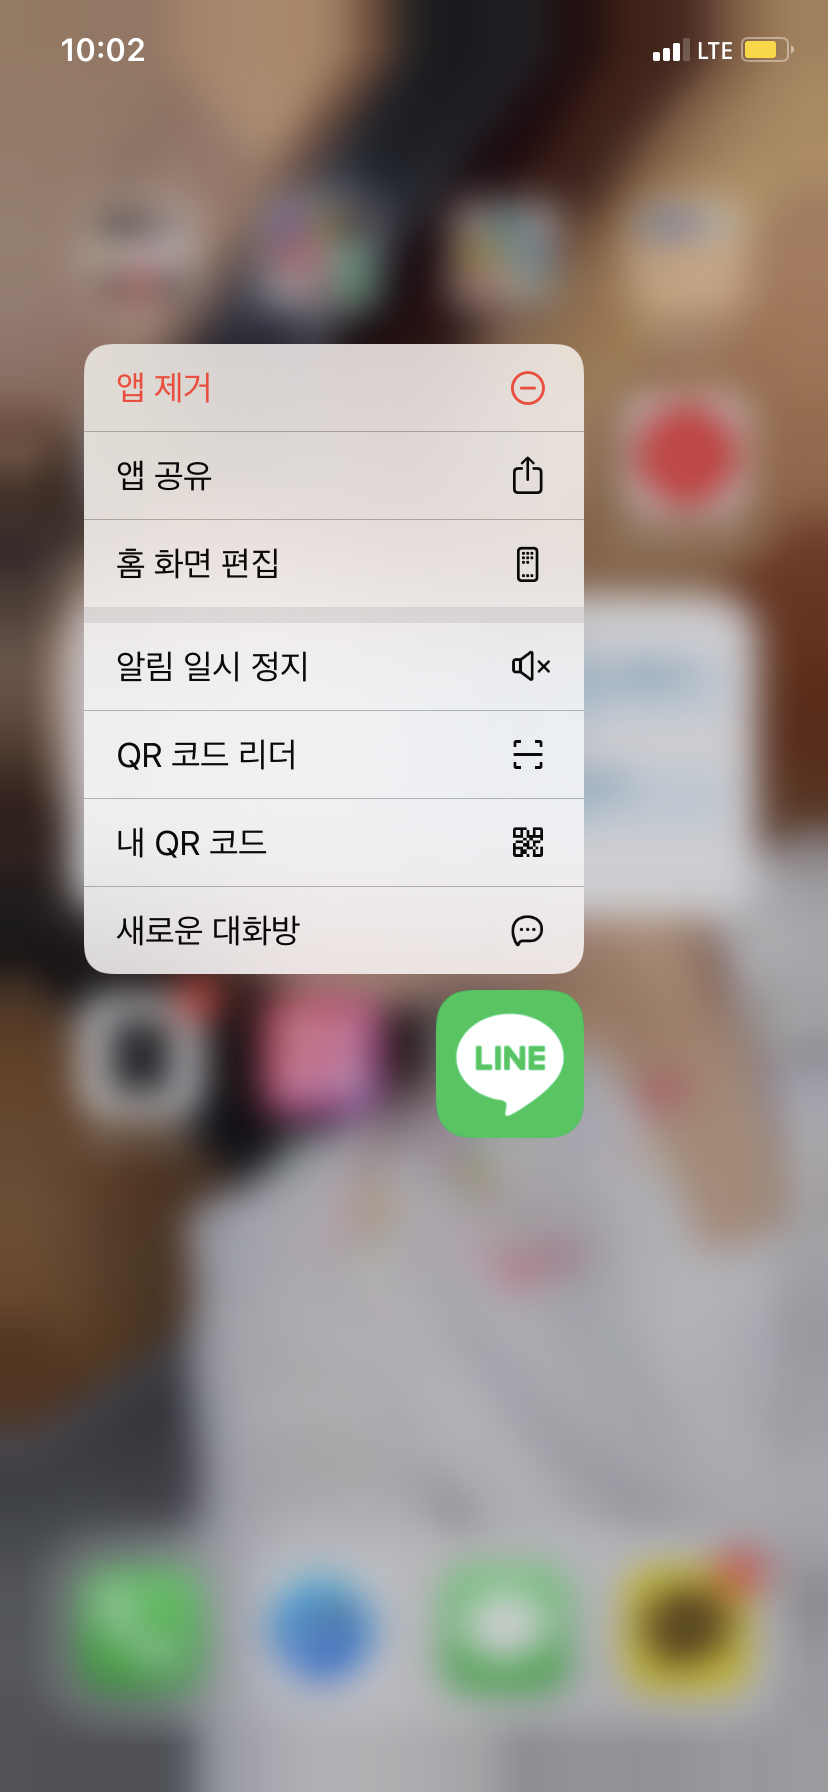
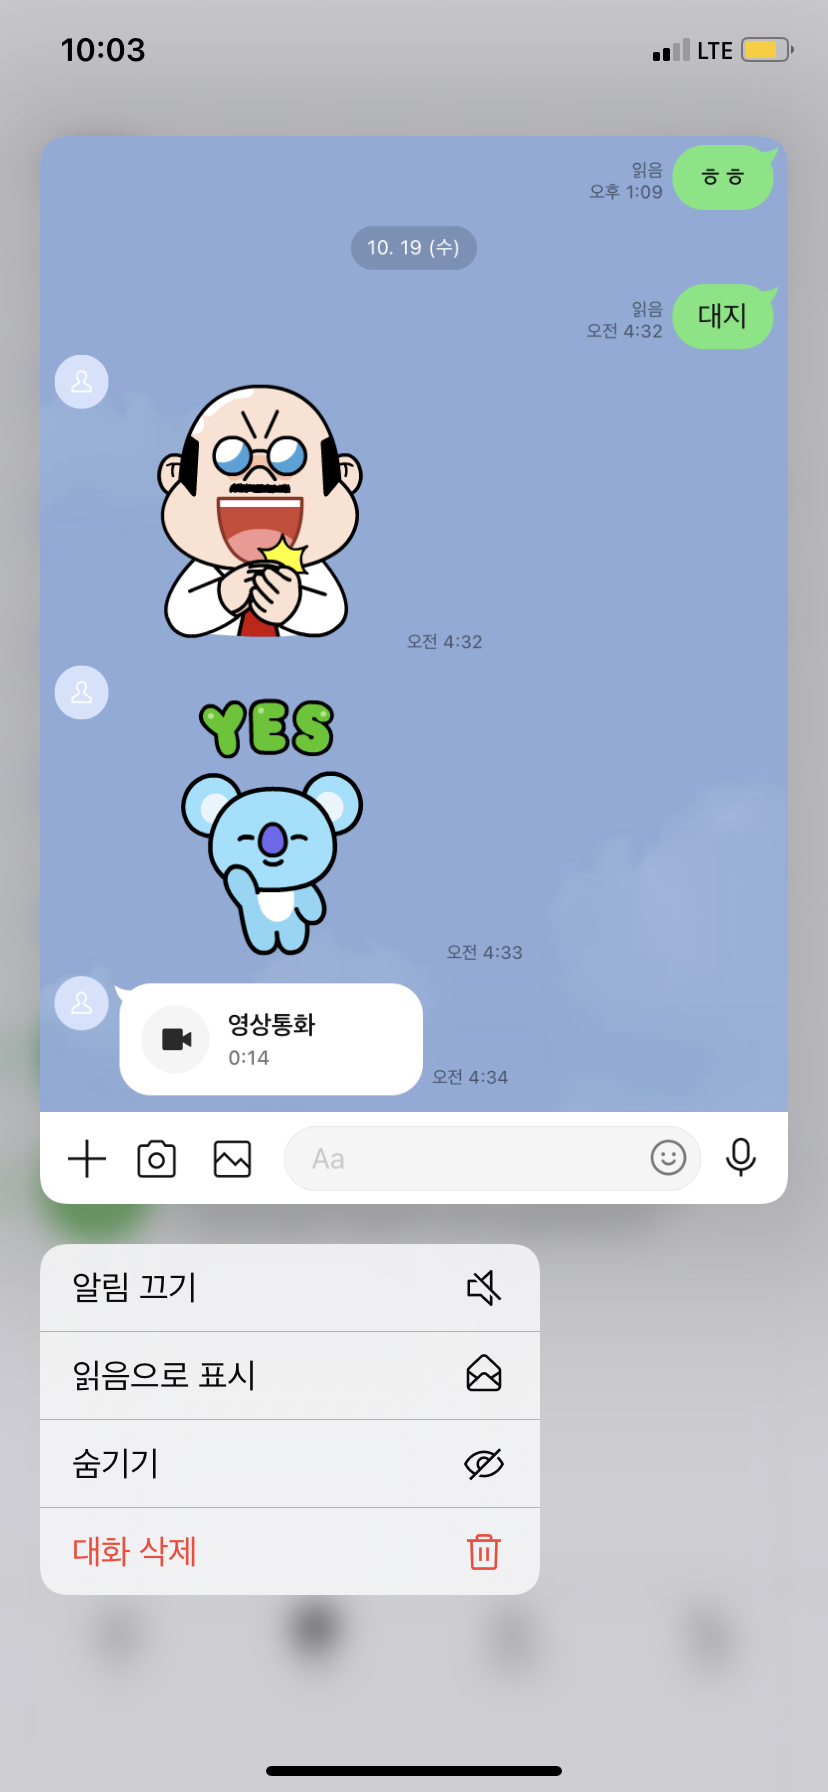
위와 같은 메뉴가 context menu이다.
context menu 사용해보기
그럼 이 context menu를 이용해서 뷰의 색상을 변경해보는 예제 앱을 만들어보자!
- contextView.swift
struct ContentView: View {
    @State private var foregroundColor: Color = .white
    @State private var backgroundColor: Color = .purple

    var body: some View {
        VStack {
            Text("Hello, world!")
                .font(.largeTitle)
                .padding()
                .foregroundColor(foregroundColor)
                .background(backgroundColor)
                .contextMenu {
                    Button(action: {
                        self.foregroundColor = .black
                        self.backgroundColor = .white
                    }) {
                        Text("Normal Colors")
                        Image(systemName: "paintbrush")
                    }

                    Button(action: {
                        self.foregroundColor = .white
                        self.backgroundColor = .purple
                    }) {
                        Text("Purple Colors")
                        Image(systemName: "paintbrush.fill")
                    }
                }
        }
        .padding()
    }
}
적절한 사용에는 Human Interface Guideline을 보도록 하자.
Context menus - Menus and actions - Components - Human Interface Guidelines - Design - Apple Developer
A context menu provides access to functionality that’s directly related to an onscreen item, without cluttering the interface. Although a context menu provides convenient access to frequently used items, it’s hidden by default, so people might not know
developer.apple.com
- Navigation으로 이동할 때, Tab Bar 없애는 방법?
Introducing SwiftUI TabView and Working with Tab Bar Customization
SwiftUI TabView Introduction and Tab Bar Customization
SwiftUI provides a UI component called TabView for building a tab bar interface. This tutorial shows you how to work with it and customize the tab bar.
www.appcoda.com
'외부활동 > 멋사 앱스쿨 1기' 카테고리의 다른 글
| [SwiftUI] Graphic Drawing... 스유에서 도형을 그려보시겠습니까? (0) | 2022.12.09 |
|---|---|
| [SwiftUI] List, Navigation을 이용해서 간단한 앱 구현하기 (EVCar Demo) (0) | 2022.12.09 |
| [SwiftUI] Observable Object와 Environment Object에 대해 알아보자. (0) | 2022.12.09 |
| [TIL] 22-10-21: SwiftUI 기초(룰렛 게임) (2) | 2022.10.25 |
| [TIL] 22-10-20: Typography, SwiftUI 기초(숫자 게임) (0) | 2022.10.25 |